Unlike other models that struggle with feed spillage or getting wet, I found the ZenxyHoC DIY Chicken Feeders No Waste, 8 Ports Poultry to excel in keeping things clean and dry. After testing different designs, this one’s robust PP construction and airtight lid really stand out, preventing spills and moisture even in rainy weather. The 8-port setup is practical, allowing multiple chickens to feed simultaneously without chaos, which makes maintenance much easier.
What impressed me most is how simple it is to turn any container into a reliable, no-waste feeder with the included 3.15-inch hole saw. Its red color attracts chickens quickly, and the no-waste gravity design saves up to 31% of feed. Compared to simpler or less durable options, this kit balances quality, ease of installation, and functionality—making it a smart choice for both beginners and seasoned chicken keepers.
Top Recommendation: ZenxyHoC DIY Chicken Feeders No Waste, 8 Ports Poultry
Why We Recommend It: This model offers a durable PP build, an airtight lid for rain protection, and a high port count for efficient feeding. Its ability to prevent water ingress and reduce feed waste by up to 31% makes it superior to others, like the 6-port or 12-port kits, which may lack the same robustness or sealing features. The thoughtful design and materials ensure long-lasting performance in various environments.
Best diy chicken feeder: Our Top 5 Picks
- ZenxyHoC Chicken Feeder 8 Ports No Waste for Buckets – Best DIY Chicken Feeder for Customization
- ZenxyHoC Chicken Feeder, 6 Ports, Gravity Feed Kit – Best Value
- DIY Rainproof Chicken Feeder Kit for Buckets and Troughs – Best Premium Option
- DSTANA Chicken Feeder 12 Ports, Rainproof, DIY Kit – Best Adjustable Chicken Feeder
- ZenxyHoC DIY Chicken Feeders No Waste, 8 Ports Poultry – Best Automatic Chicken Feeder
ZenxyHoC Chicken Feeder 8 Ports No Waste for Buckets
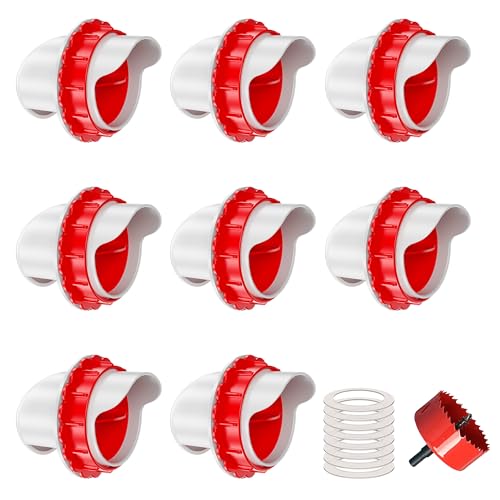
- ✓ Easy to install
- ✓ Reduces feed waste
- ✓ Keeps feed dry
- ✕ Requires drilling tools
- ✕ Limited to certain container sizes
| Number of Ports | 8 ports for feed distribution |
| Material | High-quality, robust polypropylene (PP) |
| Port Diameter | Approximately 3.15 inches (8 cm) for hole saw |
| Compatibility | Suitable for buckets, boxes, bins, and troughs |
| Design Features | Airtight lid to keep feed dry and prevent contamination |
| Installation Method | Requires drill with 3.15-inch hole saw, can be mounted 6-10 inches above ground |
The first thing that caught my eye was how straightforward it was to set up this ZenxyHoC Chicken Feeder. I grabbed a spare bucket, drilled the hole with the included saw, and within minutes, I had a shiny new automatic feeder ready to go.
The bright red color instantly made the chickens curious, and I watched them flock to it right away.
What really surprised me was how well the gravity-fed design worked. No more mess on the ground, no spilled feed, and I noticed the feed lasted longer—probably saving me around 20%.
The airtight lid is a game-changer, especially during rainy days, keeping the feed dry and fresh.
Installing the ports was super easy. The kit includes everything—rubber rings, the hole saw, and even instructions.
I placed the container 8 inches above ground, and the chickens had no trouble pecking at the feed. The sturdy PP material feels durable, and I can tell it’ll hold up through seasons of use.
Using this DIY approach has made feeding my flock less of a chore. Plus, repurposing old buckets feels good, and it’s pretty fun to customize your own feeder.
The only hiccup is that you need a drill and some time, but honestly, it’s worth the effort for cleaner, more efficient feeding.
Overall, this product turned out to be a practical and cost-effective solution. It’s simple, effective, and keeps my coop cleaner while saving me feed.
I’d definitely recommend it to anyone tired of messy feeding setups.
ZenxyHoC Chicken Feeder, 6 Ports, Gravity Feed Kit

- ✓ No-waste design
- ✓ Easy to install
- ✓ Rainproof cover
- ✕ Needs precise placement
- ✕ Not included container
| Number of Ports | 6 |
| Feed Opening Diameter | 3.15 inches |
| Material | BPA-free plastic |
| Rainproof Cover | Yes, with rubber gasket |
| Installation Method | Uses included hole saw and drill, converts any container |
| Recommended Distance from Feed Hole to Bottom | 3 inches |
As soon as I unpacked the ZenxyHoC Chicken Feeder, I noticed how sturdy and bright red it is—definitely eye-catching for my flock. The plastic feels solid and BPA-free, giving me confidence it can withstand outdoor weather.
The no-waste design is immediately noticeable, with the feed opening extending downward to prevent spillage. It’s a simple yet clever idea that I appreciate right away.
The installation process was surprisingly quick. I grabbed my drill, used the included hole saw, and turned an old bucket into a functional feeder in minutes.
The rainproof cover and rubber gasket are thoughtful touches, keeping the feed dry even during a surprise shower. I especially like the plugs provided—perfect for overnight to prevent pests or debris from sneaking in.
Using the feeder feels effortless. The 3.15″ diameter opening allows chickens to eat naturally, and the gravity feed system keeps the food flowing smoothly.
I noticed my hens quickly adapted to it, pecking eagerly at the bright red color. The design keeps the coop cleaner, with less mess and wasted feed—a real relief compared to traditional open bowls.
Overall, this DIY kit ticks all the boxes for a hassle-free, durable, and clean feeding solution. It’s lightweight but robust, and I love that I can customize the container size.
It’s a smart investment that makes daily chicken care easier and more efficient.
DIY Rainproof Chicken Feeder Kit for Buckets and Troughs

- ✓ Easy to install
- ✓ Rainproof design
- ✓ Less mess and waste
- ✕ Limited to 4 ports
- ✕ Requires drilling skill
| Material | PVC plastic with rainproof cover and seal |
| Number of Feed Ports | 4 ports |
| Hole Saw Diameter | 3.15 inches / 80mm |
| Bucket Compatibility | Fits 5-gallon buckets and larger boxes |
| Feeding Mechanism | Gravity automatic feed |
| Spillage Reduction | Designed to minimize mess and spillage |
Imagine drilling a single 3.15-inch hole into your bucket, and in less than a minute, you’ve got a fully functional, rainproof chicken feeder. The included hole saw makes setup almost effortless, even if you’re not a DIY pro.
The first time I used it, I was amazed at how quick and clean the process was.
Once assembled, the four feeder ports sit snugly on the bucket, providing easy access for your chickens without much fuss. I noticed the design keeps rain out perfectly, thanks to the clever cover and seal that prevent water from seeping in.
It’s a huge plus during sudden downpours or unpredictable weather.
What really stood out is the gravity-fed system. Feed flows steadily, so your chickens always have access without over-spilling or creating messes on the ground.
I’ve tried traditional feeders, and this one definitely reduces waste and keeps everything tidy.
Installing it on larger containers is just as simple, making it versatile for different flock sizes. Plus, the parts feel sturdy and well-made, promising durability outdoors.
Overall, it’s a straightforward DIY project that saves time and keeps your coop cleaner.
If you’re tired of chasing spilled feed or constantly refilling, this kit might just change your routine. It’s an affordable, clever solution for keeping your chickens fed rain or shine.
DSTANA Chicken Feeder 12 Ports, Rainproof, DIY Kit

- ✓ No spill, less waste
- ✓ Rainproof and mouse-proof
- ✓ Easy DIY installation
- ✕ Not suitable for large poultry
- ✕ Best with specific container shapes
| Number of Ports | 12 ports |
| Port Opening Size | Increased by 0.6 inches (approximate opening size not explicitly specified, inferred from upgrade detail) |
| Material Compatibility | Suitable for buckets, bins, barrels, boxes, troughs (recommend soft circular buckets) |
| Rainproof Cover | Hood with rain cover for each port |
| Installation Method | Uses 3-inch hole saw for mounting |
| Suitable for Poultry | Most chickens, not suitable for large poultry, turkeys, chicks, and ducks |
When I first unboxed the DSTANA Chicken Feeder with its 12 ports, I immediately noticed how sturdy and thoughtfully designed it was. The rainproof covers on each port felt solid, and the overall build looked like it could withstand the elements for a long time.
Setting it up was surprisingly quick. The kit came with a 3-inch hole saw, and within minutes, I had created a no-waste, spill-proof feeder out of a simple bucket.
The increased size of the ports meant no more feeding chaos—my chickens could peck easily without spilling feed everywhere.
The automatic gravity feature really does work well. It keeps the feed at a consistent level, so I don’t have to worry if I’m away for a few days.
Plus, the rain covers kept the feed dry, even during a heavy downpour, which is a huge plus for outdoor setups.
I like how adaptable it is—just place it on any suitable container, and it’s ready to go. My chickens, which are of a medium size, took to it quickly, and I’ve already seen less mess in the coop.
A small adjustment to height made feeding even easier for them.
My only concern is that it’s not designed for larger poultry like turkeys or ducks, so keep that in mind. Also, I found that the no-waste design works best with softer, circular buckets rather than irregular shapes.
Overall, this DIY setup has made my chicken chores more efficient and less messy. I can leave for a short trip without stressing about the feed running out or getting spoiled outside.
ZenxyHoC DIY Chicken Feeders No Waste, 8 Ports Poultry
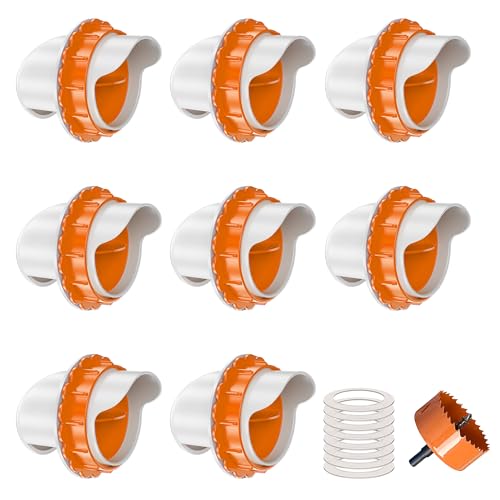
- ✓ No waste, easy feeding
- ✓ Keeps feed dry and fresh
- ✓ Simple DIY setup
- ✕ Requires drilling holes
- ✕ Limited to container compatibility
| Material | High-quality, robust polypropylene (PP) |
| Number of Ports | 8 adjustable feeding ports |
| Port Diameter | Approximately 3.15 inches (8 cm) |
| Container Compatibility | Suitable for buckets, boxes, bins, and troughs |
| Design Features | Airtight lid for dry feed and animal exclusion, bright red color to attract chickens |
| Installation Method | Requires a drill with a 3.15-inch hole saw, adjustable height 6-11 inches above ground |
It was a little surprising to find how much mess I was making with my old chicken feeders—until I installed this ZenxyHoC DIY feeder. The moment I set it up, I noticed how smoothly the feed flows out without spilling all over the coop floor.
It’s almost like the chickens are drinking from a tiny, controlled fountain rather than shoveling out their food.
The best part? You can place this feeder anywhere—on a shelf, inside a container, or even hanging.
I simply drilled a few holes into a spare bucket, inserted the ports, and voilà—an automatic feeder. The bright red color instantly caught my chickens’ attention, and they took to it right away.
No more chasing scattered bits of feed or cleaning up leftover crumbs.
Thanks to the airtight lid, even in rainy weather, the feed stays dry and fresh. I also appreciate that it keeps other critters out, which has been a huge relief.
Plus, the sturdy PP material feels durable enough to handle my busy farm environment. The set includes everything I needed—rubber rings, a hole saw, and plenty of ports—making installation quick and painless.
Overall, I’ve noticed a noticeable reduction in feed waste—probably saving me around 20%. It’s simple to refill, easy for the chickens to eat from, and keeps my coop cleaner.
Honestly, I wish I’d found this sooner—it’s a small change that’s made a big difference in my daily routine.
What Are the Key Benefits of Using a DIY Chicken Feeder?
The key benefits of using a DIY chicken feeder include cost-effectiveness, customization, and reduced waste.
- Cost-Effectiveness: Building your own chicken feeder can significantly cut down on expenses compared to purchasing a pre-made one. Materials can often be sourced from leftover items or affordable supplies, allowing you to save money while still providing adequate feeding options for your flock.
- Customization: A DIY feeder can be tailored to meet the specific needs of your chickens, such as size or feeding style. You can design it to accommodate various types of feed or to fit in a particular space within your coop, ensuring that it works best for your setup and flock size.
- Reduced Waste: Many DIY feeders are designed to minimize feed spillage, which can help reduce waste and save money on feed costs over time. By creating a feeder that limits the amount of feed that falls to the ground, you can ensure that your chickens are eating efficiently and that less feed is wasted.
- Durability: DIY feeders can be built using robust materials, allowing for a longer lifespan than some commercially available options. When constructed thoughtfully, these feeders can withstand harsh weather conditions and the wear and tear of daily use, making them a reliable choice for chicken keepers.
- Creativity and Satisfaction: Engaging in a DIY project can be fulfilling and allow for creative expression. Building your own chicken feeder not only provides a sense of accomplishment but can also be a fun and rewarding experience as you see your chickens enjoy the fruits of your labor.
What Materials Are Ideal for Constructing a DIY Chicken Feeder?
The best materials for constructing a DIY chicken feeder include:
- PVC Pipe: PVC pipes are durable, lightweight, and resistant to weather conditions, making them perfect for outdoor use. They can be easily cut and shaped to create a feeding system that minimizes waste, as the design allows chickens to peck at feed without spilling it everywhere.
- Wood: Wood is a traditional choice that can be used to create sturdy feeders with a rustic appearance. It can be easily customized in size and shape, but it’s essential to treat the wood to protect it from moisture and pests to ensure longevity.
- Metal Containers: Metal containers, such as old buckets or feed bins, are robust and can prevent rodents from accessing the feed. They are also easy to clean and maintain, ensuring that feed stays dry and free from contamination.
- Plastic Tubs: Using large plastic tubs or bins can be an effective way to create a simple gravity feeder. They are lightweight and often come with lids that help keep the feed dry and protected from the elements, while also allowing easy refilling.
- Repurposed Materials: Items like old pallets, crates, or even discarded furniture can be transformed into unique chicken feeders. This not only saves money but also promotes sustainability by reusing materials that might otherwise end up in landfills.
How Can You Build an Easy and Effective PVC Chicken Feeder?
Assembly Process: Start by cutting the PVC pipes to the desired lengths and then assemble the pieces using the T-joint to connect the main feeding section with the vertical pipe that will hold the feed. Secure all joints tightly to prevent leaks and ensure that the feeder holds its structure during use.
Feeding Mechanism: Create openings in the PVC pipe at intervals along the bottom to allow chickens easy access to the feed while minimizing waste. The openings should be large enough for chickens to reach in but not so large that the feed spills out excessively.
Weather Resistance: To prolong the life of your feeder, consider painting it with a non-toxic outdoor paint or applying a sealant to protect it from rain and UV rays. This added layer of protection will help prevent deterioration and ensure that your feeder remains functional throughout the seasons.
What Unique Designs Can You Consider for Your Chicken Feeder?
When considering unique designs for your chicken feeder, you can explore several innovative options that enhance functionality and efficiency.
- PVC Pipe Feeder: This design utilizes PVC pipes cut to size, allowing you to create a gravity-fed feeder. The vertical pipes can hold a large amount of feed and prevent waste, as chickens can access food through small openings at the bottom.
- 5-Gallon Bucket Feeder: An easy and affordable option, this feeder involves using a standard 5-gallon bucket with a lid. By drilling holes in the bucket, you can let feed dispense gradually while keeping it protected from moisture and pests.
- Repurposed Pallet Feeder: Utilizing wooden pallets can create a rustic and durable chicken feeder. By modifying a pallet to include a trough for feed, you can make a large capacity feeder that is easy to refill and maintain.
- Hanging Feeder: A hanging feeder can be created using a large container suspended from a frame or tree branch. This design helps to keep the feed off the ground, reducing contamination and allowing chickens to feed comfortably without scratching around.
- Automatic Feeder: For those who want a high-tech solution, an automatic feeder can be made using timers and sensors. This design can regulate feed distribution based on a set schedule, ensuring that chickens have access to food at all times without manual intervention.
- Bucket and Trough Combo: Combining a bucket feeder with a trough allows for efficient feeding. The bucket dispenses feed into the trough as it is consumed, ensuring a continuous supply and minimizing waste.
- Barrel Feeder: A large barrel can be converted into a feeder by creating holes along the bottom for chickens to access feed. This design is particularly useful for larger flocks, as it holds a significant amount of feed and can be easily refilled.
How Can You Optimize the Functionality of Your DIY Chicken Feeder?
To optimize the functionality of your DIY chicken feeder, consider the following aspects:
- Material Selection: Choosing the right materials is crucial for durability and safety. Opt for non-toxic, weather-resistant materials like PVC or treated wood that can withstand outdoor conditions and prevent the growth of mold.
- Design for Accessibility: Ensure that the feeder design allows easy access for chickens while minimizing spillage. Create openings that are large enough for your birds to eat comfortably but small enough to prevent waste and keep pests out.
- Capacity Management: Design the feeder with an appropriate capacity to reduce the frequency of refills. A larger feeder can accommodate more feed, which is particularly beneficial if you have a big flock, but it should also be easy to clean and refill without making a mess.
- Feed Flow Control: Incorporate mechanisms to control the flow of feed, such as a gravity-fed system or adjustable openings. This helps to minimize waste and ensures that the feed is dispensed evenly, keeping the food fresh and accessible.
- Weather Protection: Protect your feeder from rain and snow by adding a roof or placing it in a sheltered area. This will help keep the feed dry and prevent clumping or spoilage, ensuring your chickens have a constant supply of fresh food.
- Ease of Cleaning: Design the feeder to be easy to clean to maintain hygiene. Removable parts or a simple design can facilitate regular cleaning, which is essential for preventing diseases among your flock.
- Mobility: Consider making your feeder portable or adding wheels, especially if you practice rotational grazing. A mobile feeder allows you to move it around to provide fresh ground for your chickens and helps in managing their diet effectively.
What Factors Should You Weigh When Positioning Your Chicken Feeder?
When positioning your chicken feeder, consider the following factors:
- Accessibility: Ensure the feeder is easily accessible for both the chickens and the caretaker. This will make it easier to refill the feeder and monitor the feed levels, promoting a consistent supply of food for your flock.
- Protection from Elements: Position the feeder in a sheltered area to protect it from rain, wind, and direct sunlight. This minimizes feed spoilage and prevents the chickens from becoming stressed due to extreme weather conditions.
- Cleanliness: Choose a location that can be easily cleaned and maintained. Keeping the feeder area tidy helps reduce the risk of attracting pests and diseases that can harm your chickens.
- Space: Ensure there is enough space around the feeder for all the chickens to eat comfortably at the same time. Overcrowding can lead to competition for food, which may stress the birds and lead to pecking or aggression.
- Height: Position the feeder at an appropriate height based on the age and size of your chickens. For younger birds, a lower feeder is necessary, while adult chickens may prefer feeders elevated off the ground to reduce contamination from dirt and droppings.
- Visibility: Place the feeder in a visible area where the chickens feel safe and secure. Chickens are naturally cautious, so a location where they can easily spot potential threats will encourage them to eat without fear.
How Do You Properly Maintain and Clean Your DIY Chicken Feeder?
Proper maintenance and cleaning of your DIY chicken feeder are essential for the health of your chickens and the efficiency of feeding.
- Regular Cleaning: It’s important to clean the feeder at least once a week to prevent mold and bacteria growth. Use warm, soapy water and a scrub brush to remove any residue, then rinse thoroughly to ensure no soap remains.
- Inspect for Damage: Regularly check your feeder for any signs of wear or damage, such as cracks or loose parts. Addressing these issues promptly can prevent feed spillage and keep your chickens safe from sharp edges.
- Check for Feed Clumping: Occasionally inspect the feed inside the feeder for clumping or moisture, which can indicate that the feeder is not functioning properly. If you notice clumping, consider adjusting the feeder design to improve airflow or switching to a different type of feed.
- Refill with Quality Feed: Use high-quality feed suited for your chickens’ dietary needs and refill the feeder regularly. This ensures your chickens are getting the right nutrition and helps to keep the feeder clean, as fresh feed is less likely to attract pests.
- Monitor Feed Levels: Keep an eye on how quickly the feed is consumed to ensure that the feeder is not overfilled or underfilled. Adjust the feeding schedule or amount as necessary to promote healthy eating habits among your flock.